If you named the Database ORCL or something that had been used on pc, change it, in my case to ORCL1 and that worked, done!
BackWaySolutions
"Most people check the back ways,to get themselves what they aspire for......"
Thursday, 7 April 2016
Thursday, 25 February 2016
Installing Active Directory on Windows Server 2012
This article will walk you through setting up the Active Directory Role on a Windows Server 2012. This article is intended to be used for those without an existing Active Directory Forest, it will not cover configuring a server to act as a Domain Controller for an existing Active Directory Forest.
Installing Active Directory
- Open the Server Manager from the task bar.
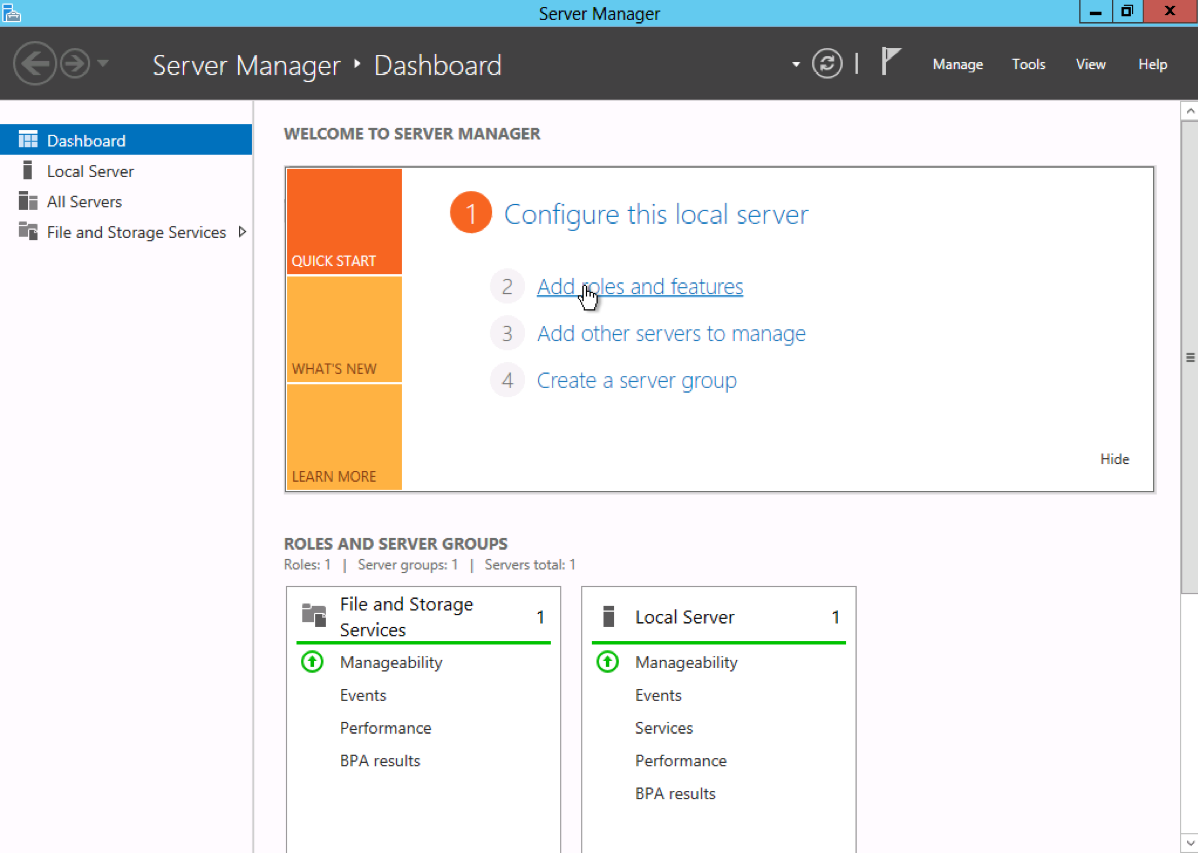
- From the Server Manager Dashboard, select Add roles and features.
This will launch the Roles and Features Wizard allowing for modifications to be performed on the Windows Server 2012 instance.
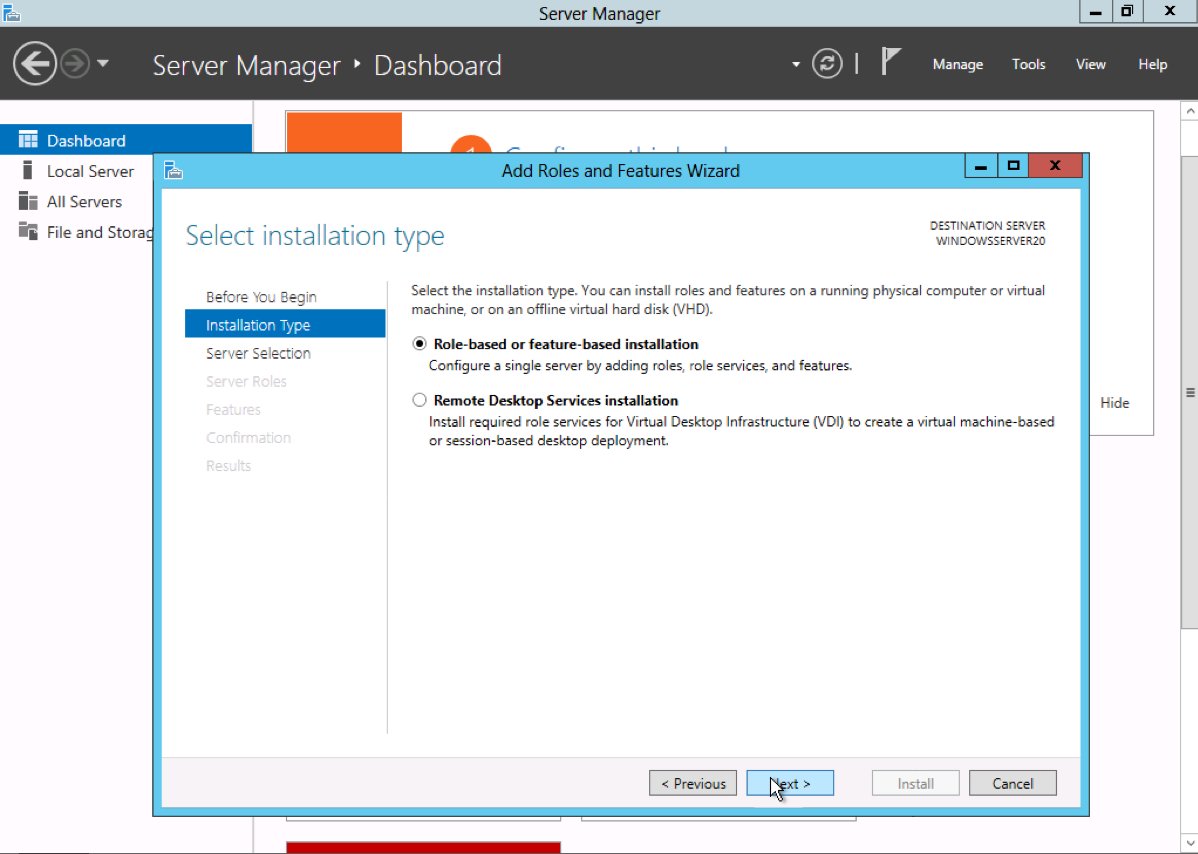
- Select Role-based or features-based installation from the Installation Type screen and click Next.
Note: Roles are the major feature sets of the server, such as IIS, and features provide additional functionality for a given role.
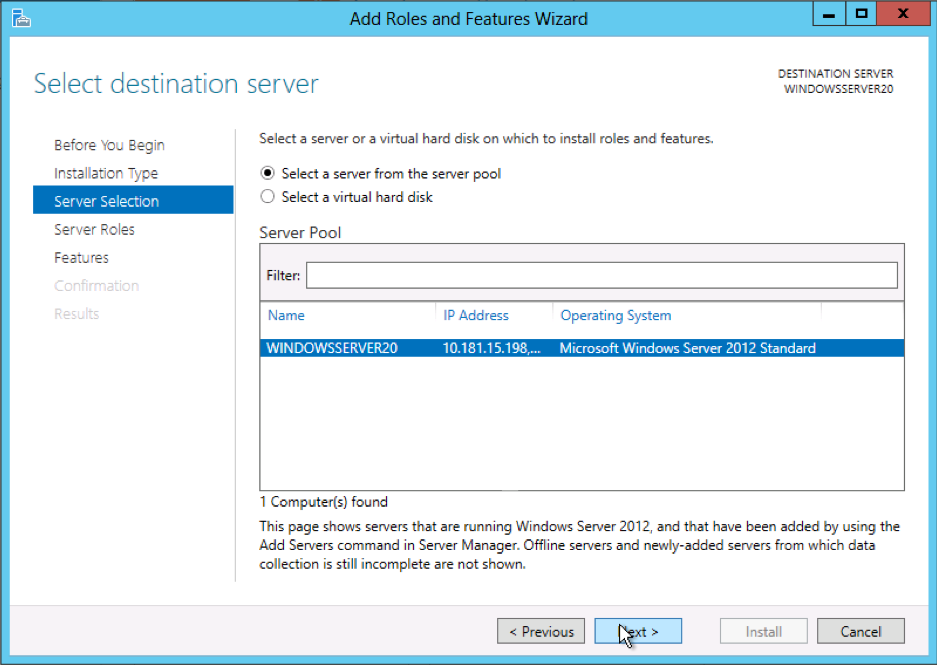
- The current server is selected by default. Click Next to proceed to the Server Roles tab.
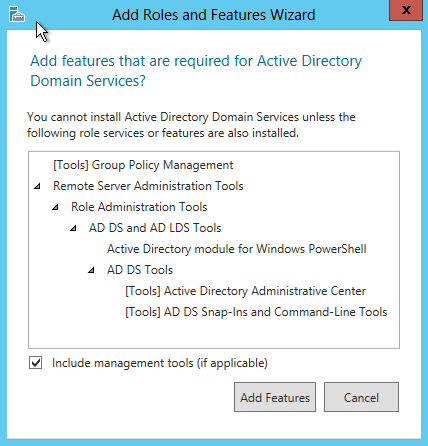
- From the Server Roles page place a check mark in the box next to Active Directory Domain Services. A notice will appear explaining additional roles services or features are also required to install domain services, click Add Features.
Note: There are other options including, Certificate services, federation services, lightweight directory services and rights management. Domain Services is the glue that holds this all together and needs to be installed prior to these other services.
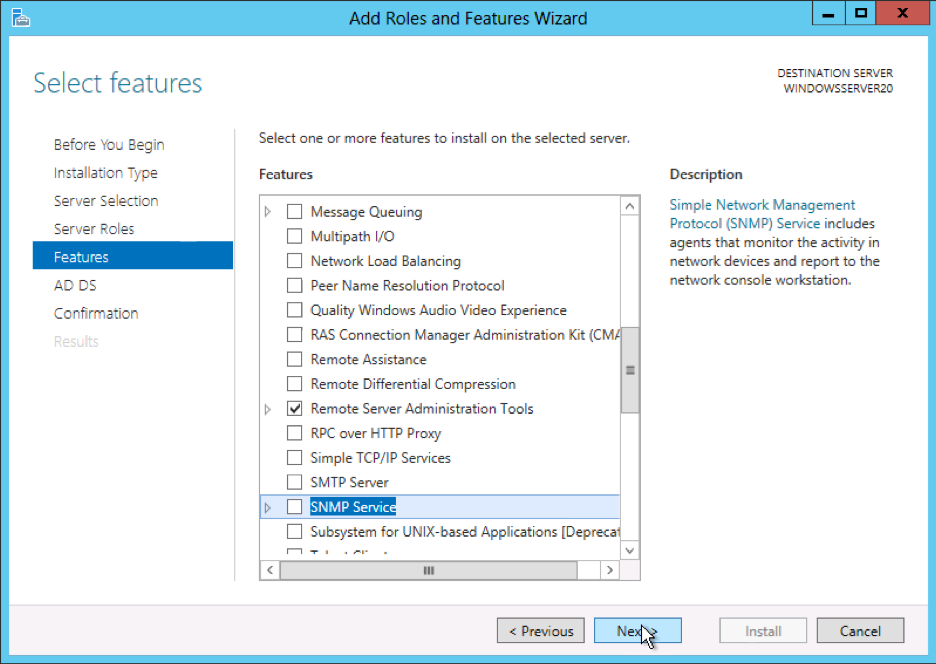
- Review and select optional features to install during the AD DS installation by placing a check in the box next to any desired features; Once done click Next.
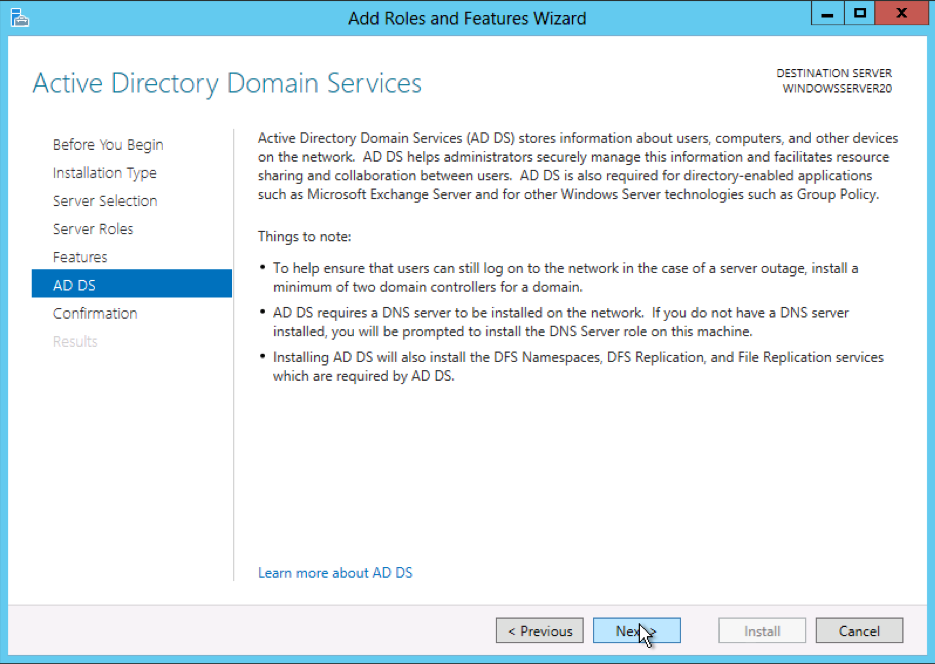
- Review the information on the AD DS tab and click Next.
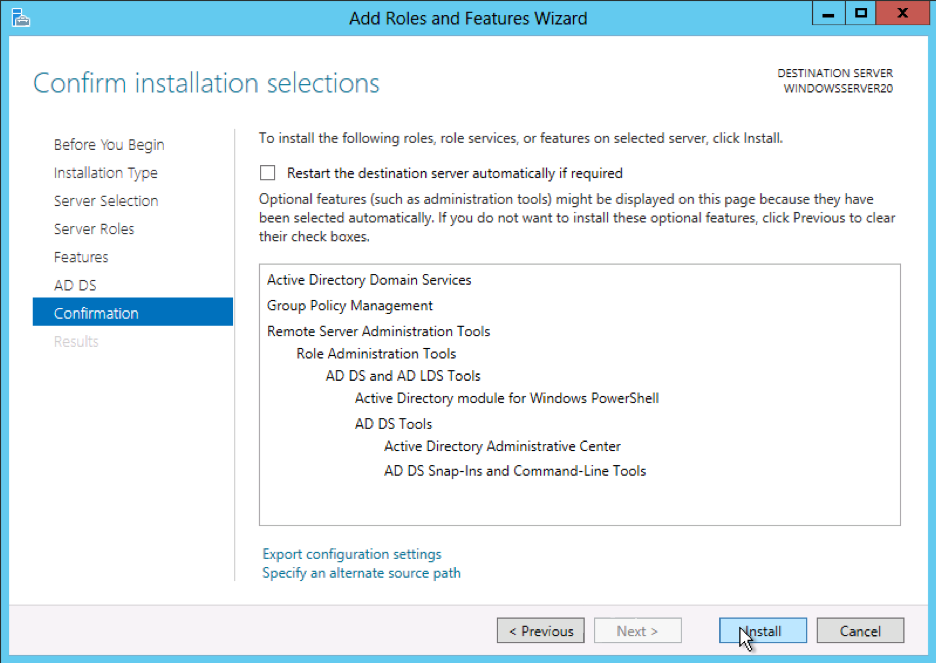
- Review the installation and click Install.
Note: The installation progress will be displayed on the screen. Once installed the AD DS role will be displayed on the ‘Server Manager’ landing page.
Configuring Active Directory
Once the AD DS role is installed the server will need to be configured for your domain.
- If you have not done so already, Open the Server Manager from the task bar.
- Open the Notifications Pane by selecting the Notifications icon from the top of the Server Manager. From the notification regarding configuring AD DS click Promote this server to a domain controller.
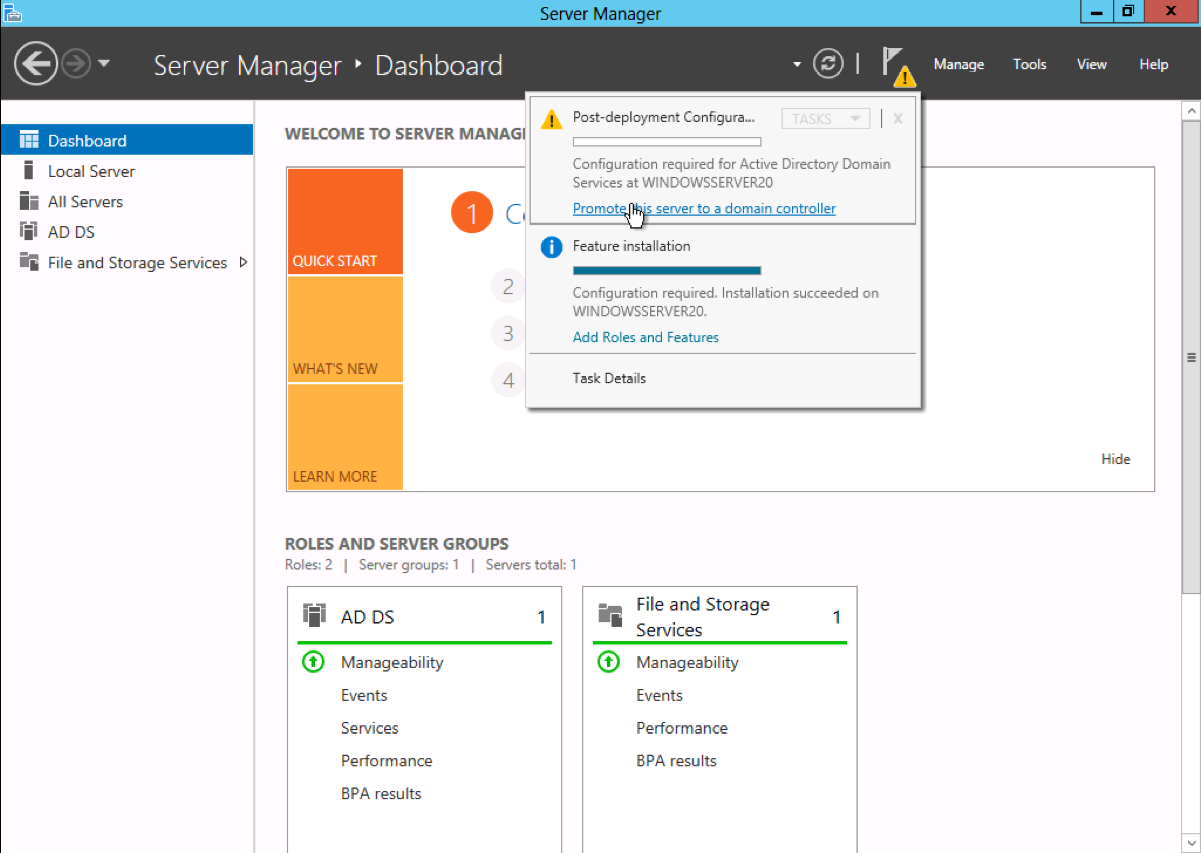
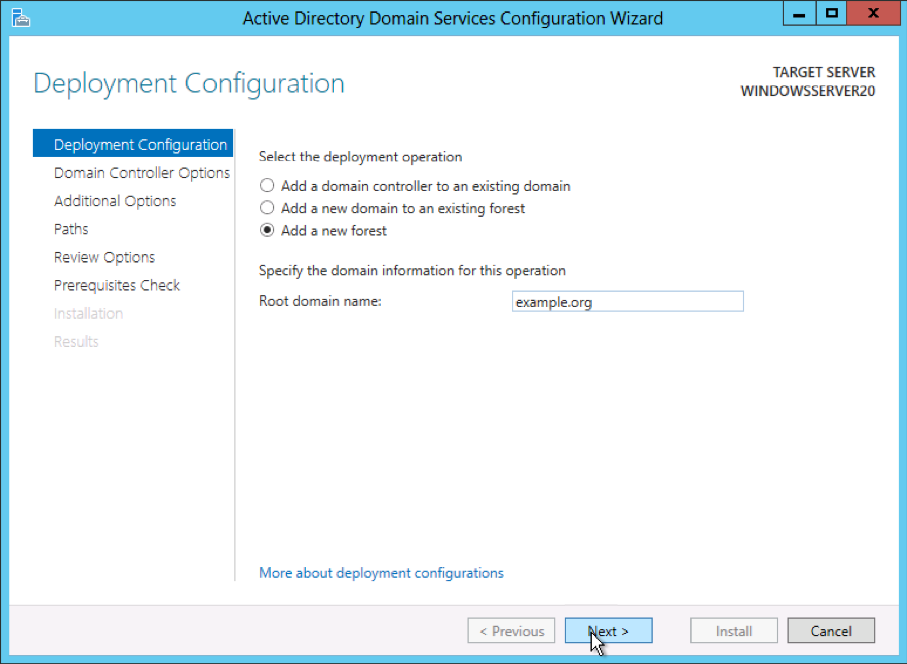
- From the Deployment Configuration tab select Add a new forest from the radial options menu. Insert your root domain name into the Root domain name field.
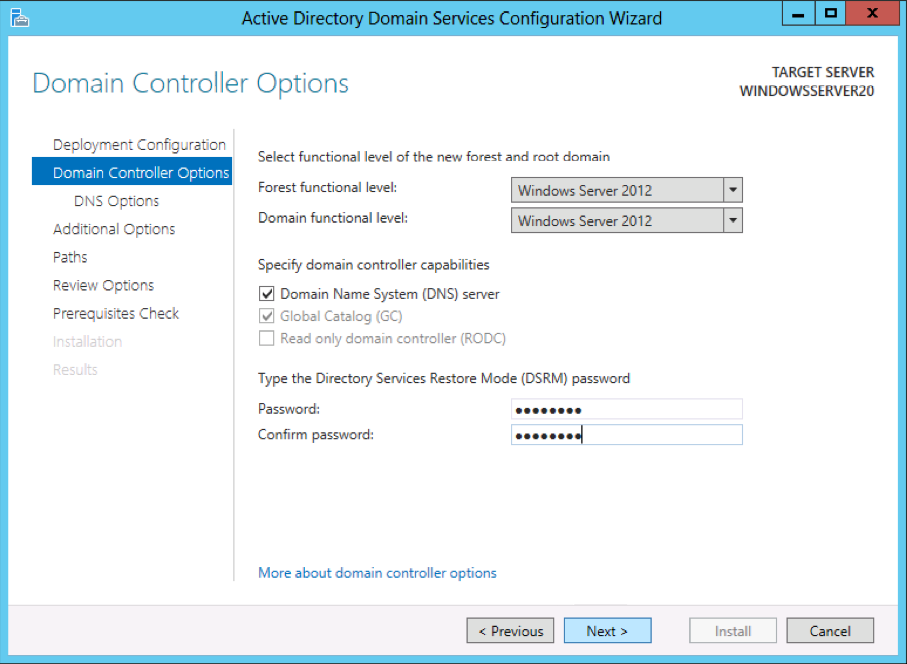
- Review and select a Domain and Forest functional level. Once selected fill in a DSRM password in the provided password fields. The DSRM password is used when booting the Domain Controller into recovery mode.
Note: The selection made here will have lasting effects to features and server domain controller eligibility. For further information on Domain/Forest functional levels see official Microsoft documentation.
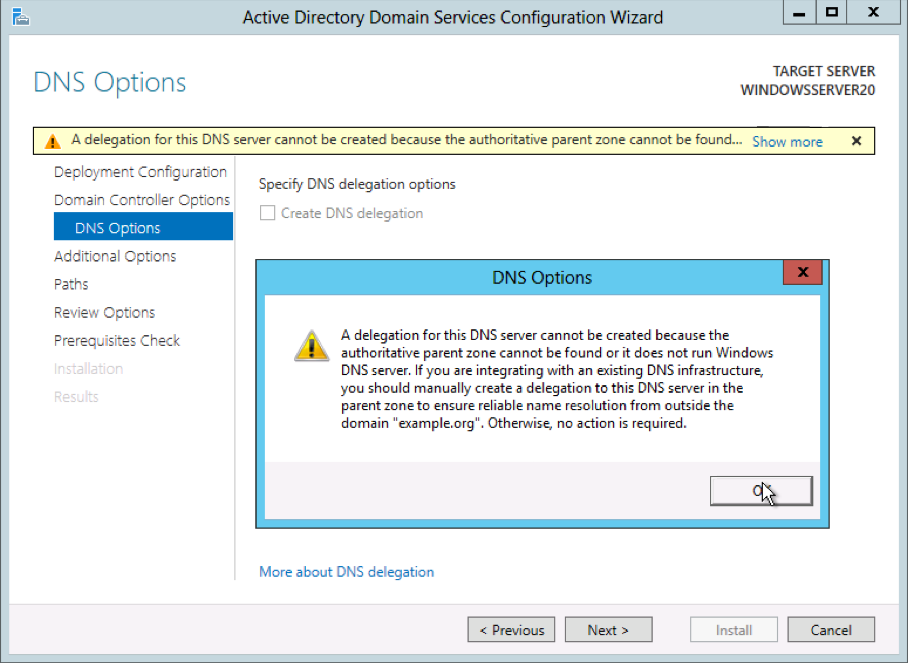
- Review the warning on the DNS Options tab and select Next.
- Confirm or enter a NetBIOS name and click Next.
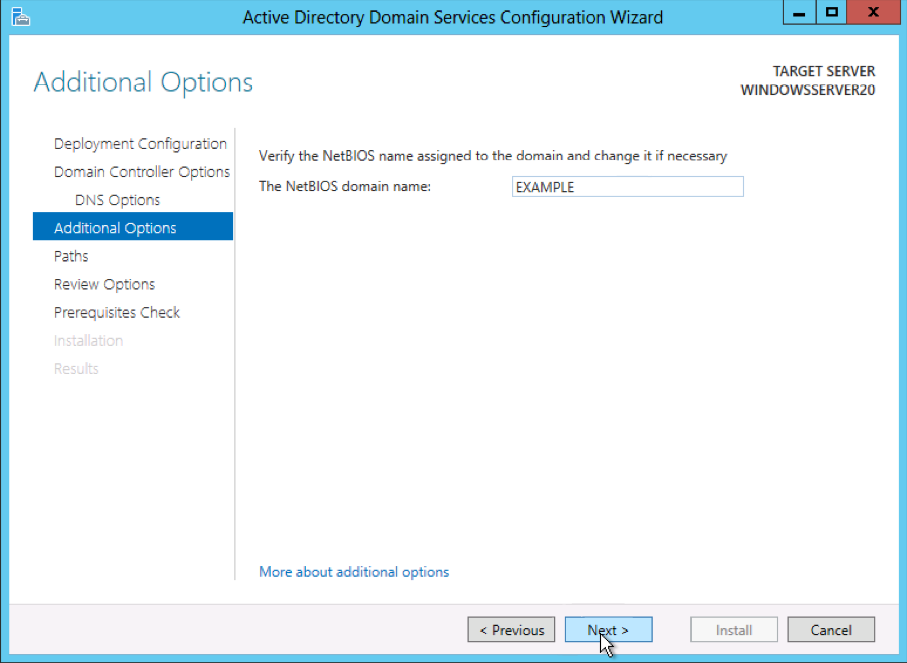
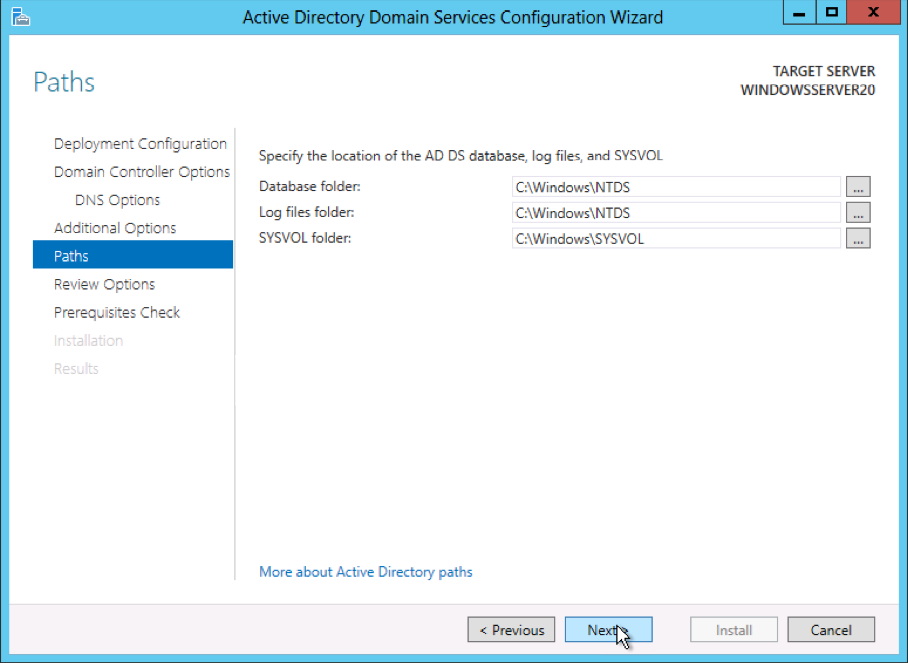
- Configure the location of the SYSVOL, Log files, and Database folders and click Next.
- Review the configuration options and click Next.

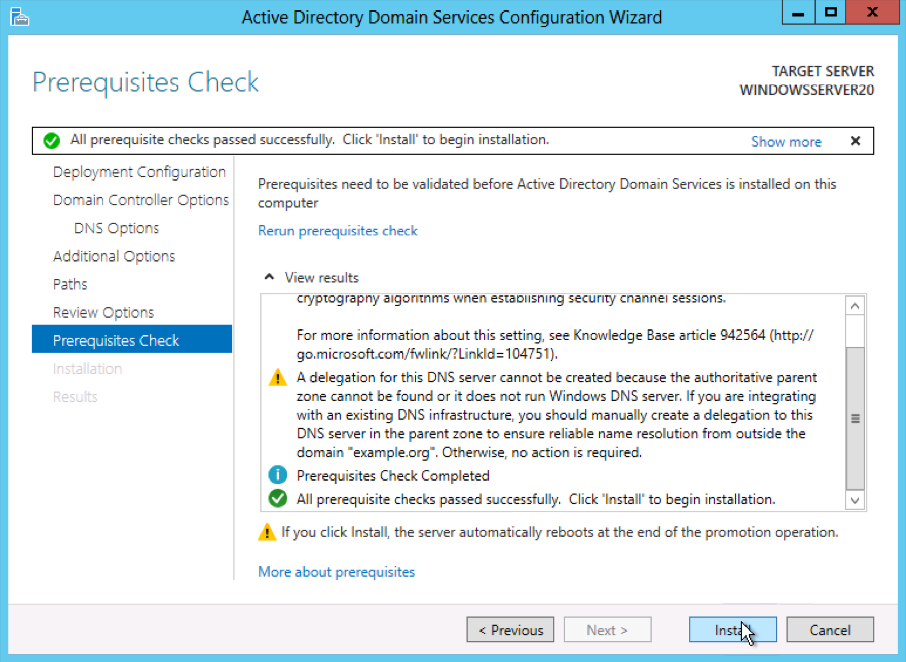
- The system will check to ensure all necessary prerequisites are installed on the system prior to moving forward. If the system passes these checks you will proceed by clicking Install.
Note: The server will automatically be rebooted once the installation completes.
After the server is done rebooting, reconnect via RDP. Congratulations on successfully installing and configuring a Active Directory Domain Services on Windows Server 2012.
Thursday, 11 February 2016
GIT installation
GIT
- INSTALLATION
This article will guide you to
install Git 2.0.5 on CentOS/RHEL 7/6/5 and Fedora 21/20 and CloudLinux 7
Systems using source code.
Step 1: Install
Required Packages
Firstly we need to make sure that we
have installed required packages on your system using following commands.
# yum install curl-devel expat-devel gettext-devel openssl-devel
zlib-devel
# yum install gcc
perl-ExtUtils-MakeMaker
Step 2: Uninstall old
Git RPM
Now remove any prior installation of
Git through RPM file or Yum package manager. If your older version is also
compiled through source, then skip this step.
# yum remove git
Step 3: Download and
Compile Git Source
# cd /usr/src
# wget https://www.kernel.org/pub/software/scm/git/git-2.7.1.tar.gz
Or
# wget –O /usr/src https://www.kernel.org/pub/software/scm/git/git-2.7.1.tar.gz
# tar xzf git-2.0.5.tar.gz
After downloading and extracting Git
source code, Use following command to compile source code.
# cd git-2.0.5
# make prefix=/usr/local/git all
# make prefix=/usr/local/git install
# echo "export PATH=$PATH:/usr/local/git/bin" >>
/etc/bashrc
# source /etc/bashrc
Step 4: Check Git
Version
One completion of above steps, you
have successfully install Git in your system. Let use following command to
check git version
# git --version
Monday, 13 July 2015
Does Windows 7 Home Premium support Remote Desktop ?
Answer
The only versions with the "server" of Remote Desktop is Professional and Ultimate. Home Premium does NOT have this.
It has Remote Desktop Connection, meaning it can connect to other PC's, but it is not able to be connected to.
The only versions with the "server" of Remote Desktop is Professional and Ultimate. Home Premium does NOT have this.
It has Remote Desktop Connection, meaning it can connect to other PC's, but it is not able to be connected to.
Tuesday, 16 September 2014
Causes of packet loss in a network
Packet loss is typically caused by network congestion. When content arrives for a sustained period at a given router or network segment at a rate greater than it is possible to send through, then there is no other option than to drop packets. If a single router or link is constraining the capacity of the complete travel path or of network travel in general, it is known as a bottleneck.
Packet loss can be caused by a number of other factors that can corrupt or lose packets in transit, such as radio signals that are too weak due to distance or multi-path fading (in radio transmission), faulty networking hardware, or faulty network drivers. Packets are also intentionally dropped by normal routing routines (such as Dynamic Source Routing in ad hoc networks) and through network dissuasion technique for operational management purposes.
A packet may be lost due to congestion: too many packets are sent, the queue gets full, and eventually the router or switch starts dropping packets. It may also occur due to different failures; including temporary cabling problems, problems in a switch or router, etc.; these in turn can cause temporary problems with the routing information (a "non-converged network"), causing the packets to travel in loops until the TTL runs out, or a router erroneously concluding that a certain address can't be reached. This latter problem might also be caused by a misconfigured router.
Saturday, 13 September 2014
FTP Installation
FileZilla Server Installation
Step 1
Download Filezilla Server setup file
from following.
Click the marked(Download FileZilla
Server) button
Ø Then save the file. Choose your
location.
Step 2 Download Install FileZilla server
Ø Right click on setup file and choose
Run as Administrator. Choose run button then “Yes” on next window.
Ø Click the next button.
Ø Click the accept button.
Ø Again click the accept button.
Ø Now you download started.Step 3
Filezilla server installation
Ø After finish the downloading click
the install now button.
Ø Installation Started. Click the next
button
Ø Choose your location and click the
next button.
Ø Click the next button.
Ø Click the install button.
Ø If view following installation
completion window click the close button.
Step 4
Start Filezilla Server
Start Filezilla Server
Ø
Click to open filezilla sercver.
Ø Click OK on the following window.
Ø Filezilla server started. Following
window click the Edit from menu bar -->Settings button
Ø On the following window choose the “Admin
interface settings” for give the password. Select the “Change admin password”
check box and give the password.
Ø Give the password and click the Ok
button.
Step 5
Group and User Add
Group and User Add
Add Group
Ø
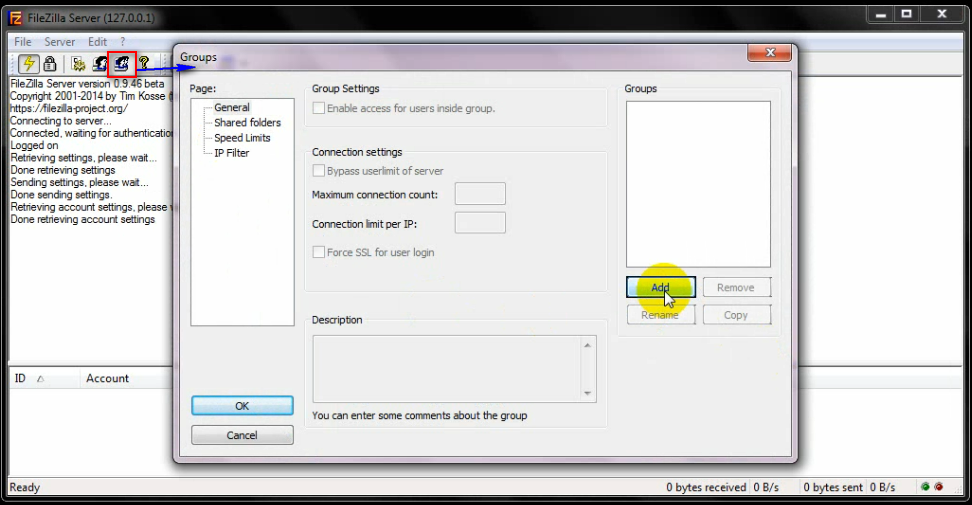
Click the group icon and click the
add button for add a new group.
Ø Select the user icon from sub menu bar Add--(username)--Select group--OK.
Step 6
Testing
Testing
Ø Go to your browser and type the URL ftp:// [enter your machine’s IP here]
Ø On the following window give your username
and password, then click the OK button.
********** Thank You**********
Subscribe to:
Comments (Atom)


